
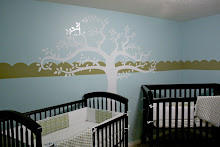
Maybe it's just me... the mother of almost 3 BOYS! But, I LOVE boys rooms! It seems like there are sooo many more options. You don't have to stick with flowers, birds, and pinks and purples. So, if anyone has a boys room you want me to practice on, I have some cute stuff I need to demo... hint, hint.
So, I got a look at Cole's room before doing the vinyl and it's all boy! Just look at his bedspread and it will tell you all about it. So, I was very excited to make him some cool silhouettes to go on the wall.

Probably my favorite ending result for this room, is that his mom put them on canvas' instead of directly on the wall! This way, not only can she take them with her if she moves, but, they look so much more define and noticeable. Sometimes, if you don't have an entire wall graphic, the vinyl can look dwarfed and out of place in the center of a huge wall. So, I would highly recommend this process when using your vinyl.


Biker 1- I love all the detail on this one and I'm so happy with how he turned out!

Skater- I LOVE his watch! Can you see it now? I was a little nervous that the board would just end up looking like a blob, but it ended up good.

Biker 2- Not my favorite. I might have to get rid of his pads, and fatten up the front of the bike... What do you guys think?

TIP FOR MOUNTING VINYL: What Cole's mom ended up doing was she took a canvas and spray painted it silver. For some reason, the vinyl wasn't too happy to stick to the painted material, or maybe just the fact that it was material in general. So, I would suggest, if you want to mount your vinyl, to use wood. I know from experience that vinyl LOVES sticking to wood, painted or not and has no issues. I've also noted that metal, glass, and tiles work just as well.


No comments:
Post a Comment